Innovation Hour In-Situ – Weekly Reflection #10

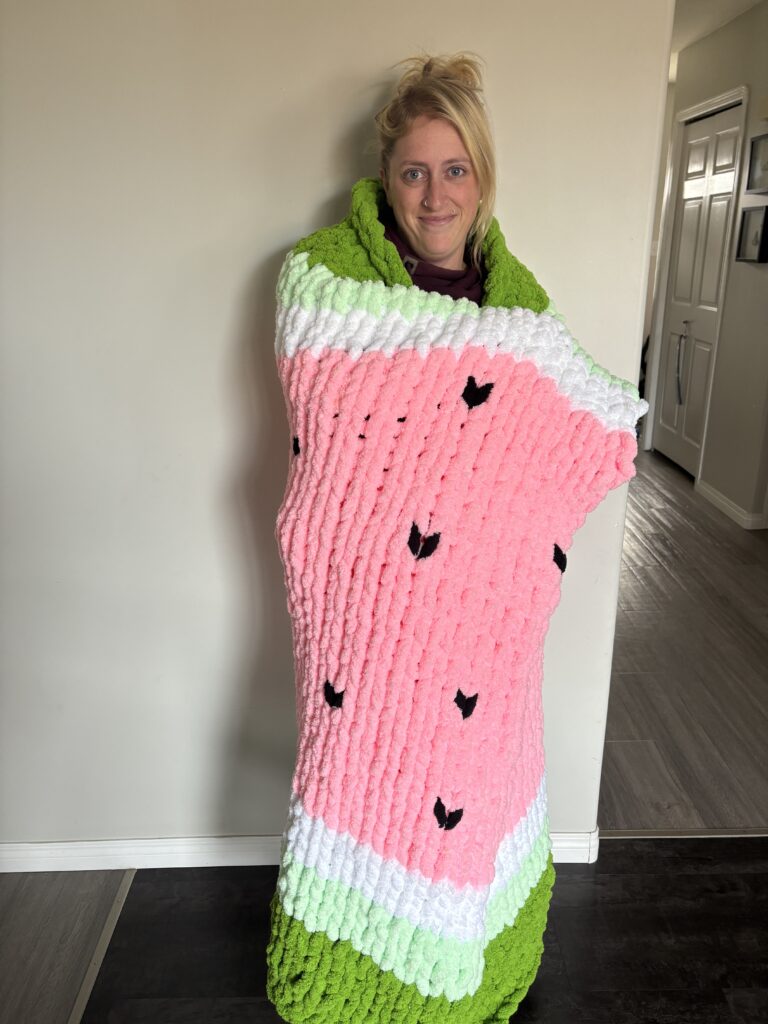
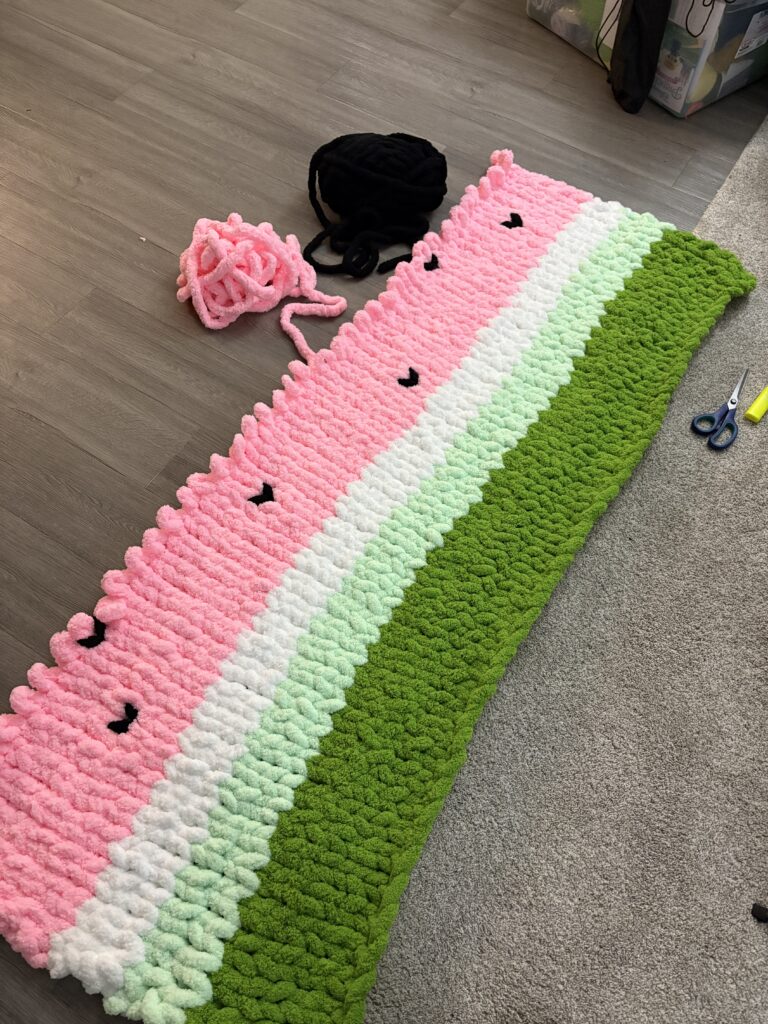
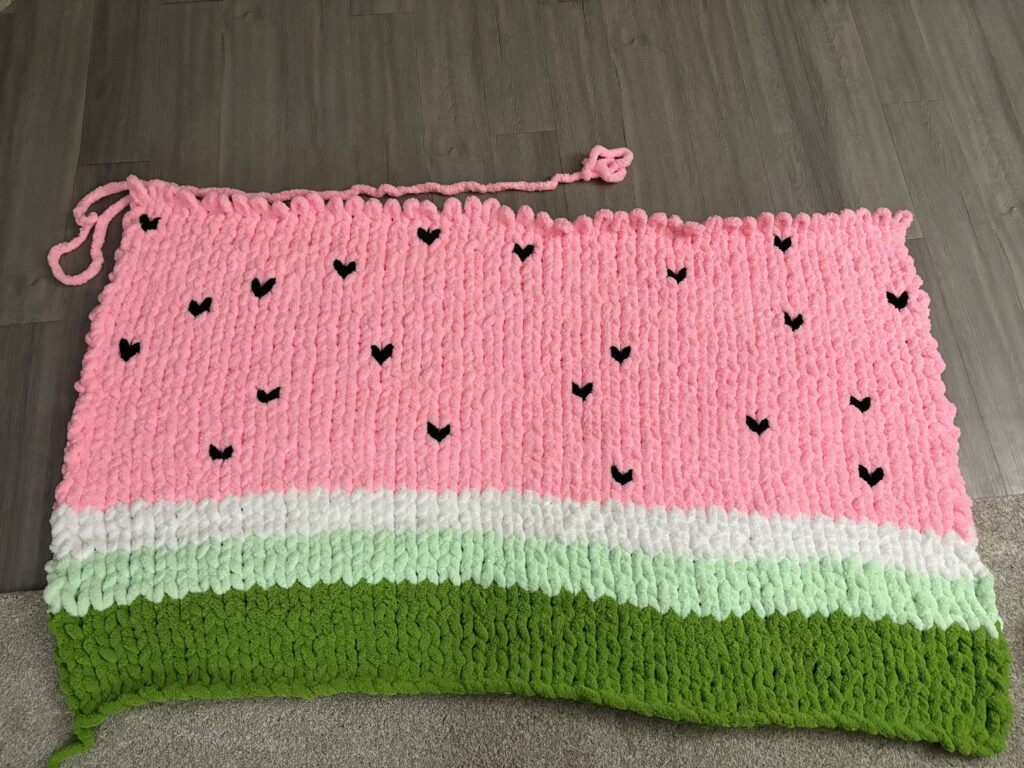
Innovation Hour In-Situ: A Day of Creativity, Curiosity, and Quick Thinking

Today, our cohort had the opportunity to bring Innovation Hour to a local K–6 school, and it turned out to be one of the most energizing, hands-on learning days of the semester. We set up a variety of stations, some high-tech, some low-tech, and some completely no-tech, to give students space to explore, build, experiment, and think like innovators. I was in charge of two stations throughout the day: the Microbit AI Movement Watches and the Button-Making Station, and both experiences taught me a lot about facilitation, encouragement, and thinking on my feet.

Microbit AI Movement Watches: Learning Through Trial, Error, and Encouragement

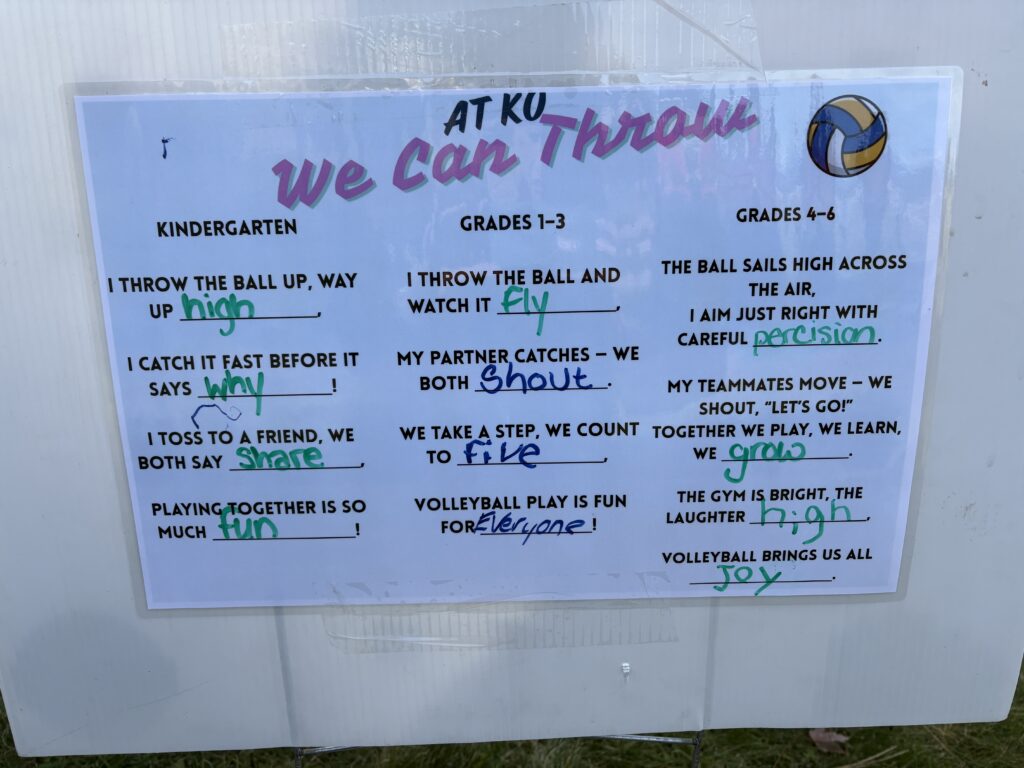
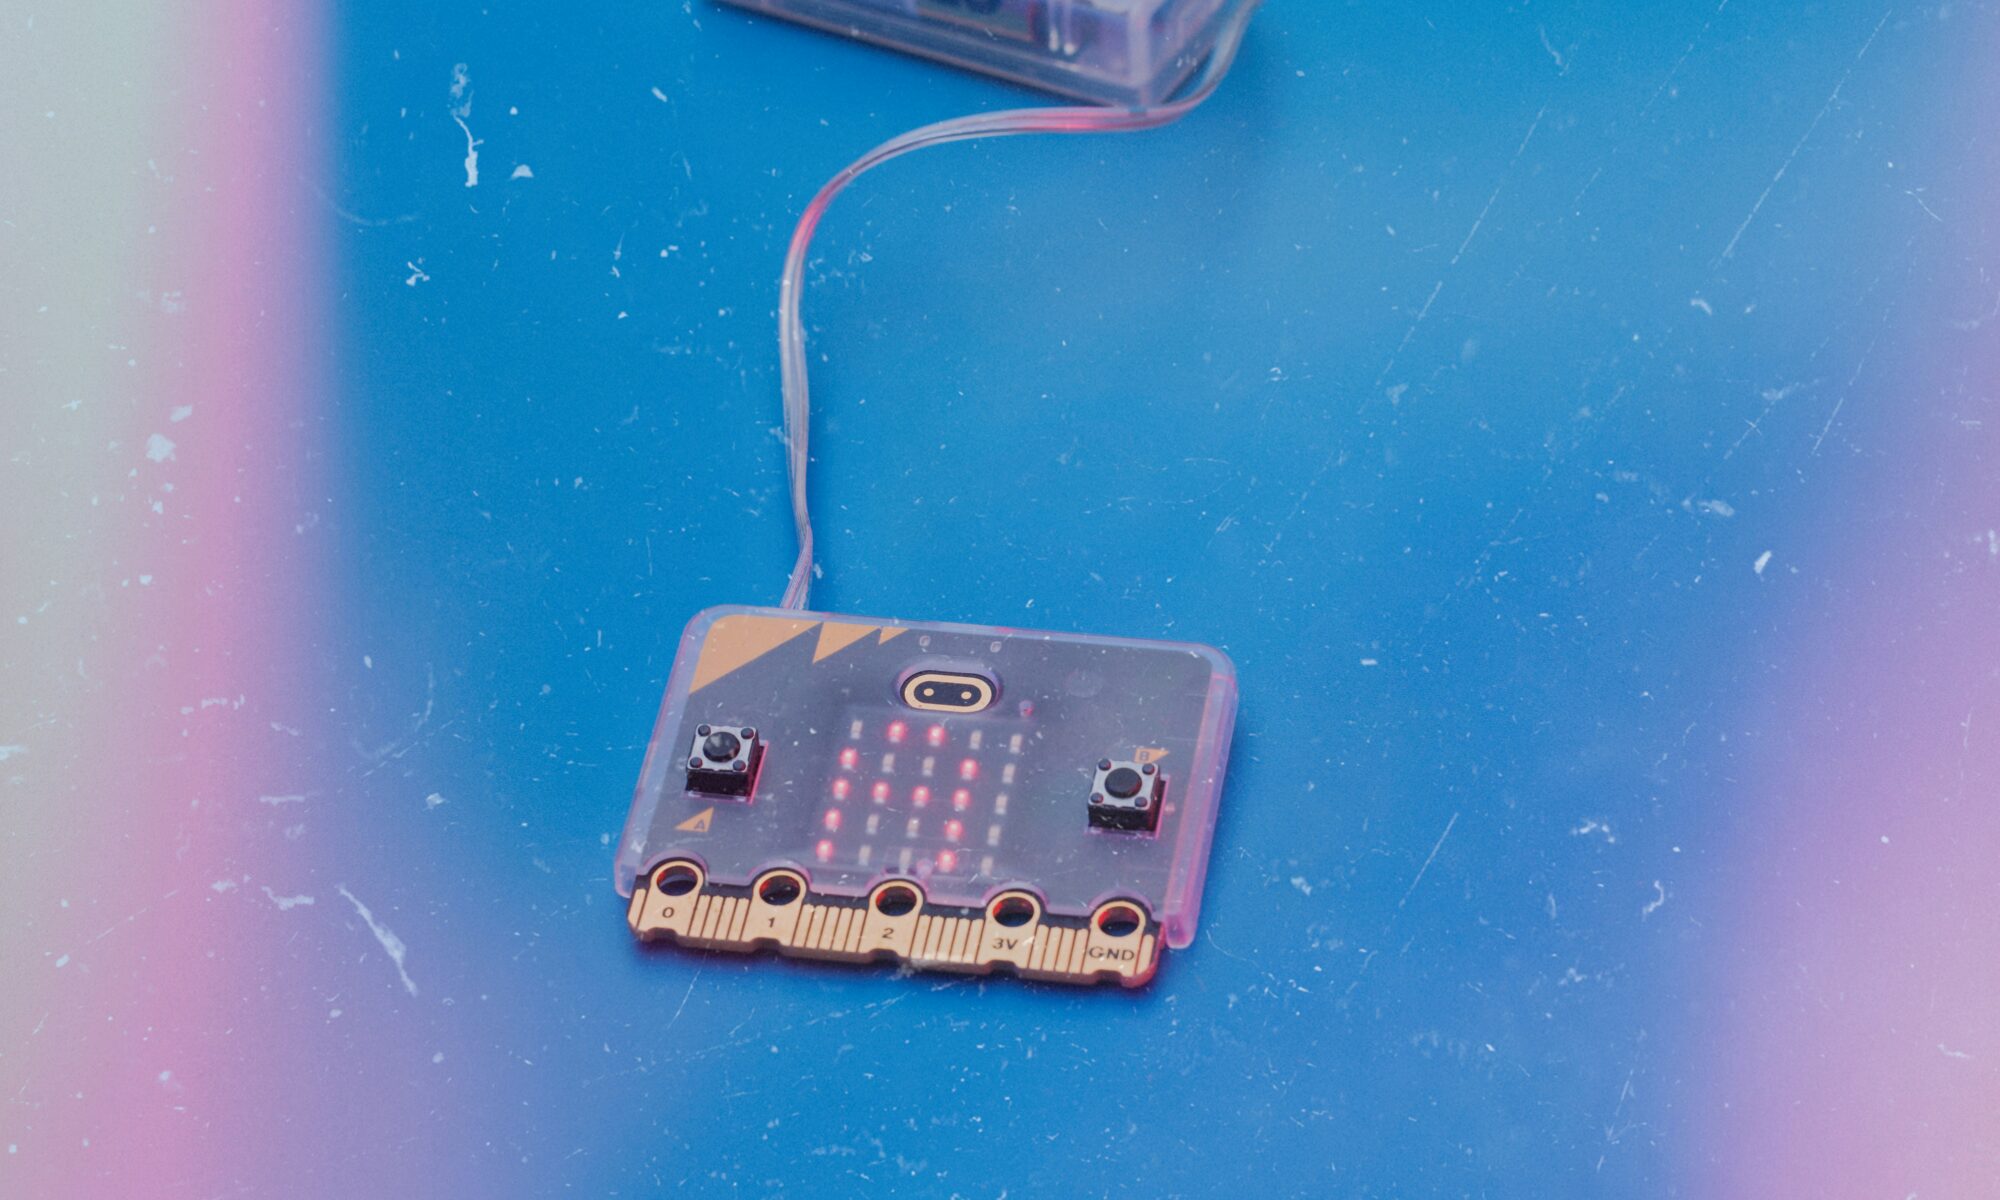
For the morning block, I worked with the Grade 5–6 students using Microbit watches programmed to detect specific movements. Each student pair would make a movement, wait for the watch to stop detecting motion, and then try to repeat it to see whether the AI recognized it as “the same.”

This activity was such a great way to help students understand that:

  • AI isn’t perfect
  • It learns from input
  • It makes mistakes just like humans
  • You need to test, revise, and double-check your results

One thing I noticed right away was how important encouragement was. The watches didn’t always pick up the movement accurately, even when the students did the exact same motion. To keep them engaged, I made sure to stay positive, model the movements alongside them, and think outside the box with my own silly or exaggerated motions.

The more playful and open I was, the more eager the students became to try new ideas. It was a great reminder that when teachers show vulnerability and curiosity, students feel safer to experiment.

Button-Making Station: Creativity, Patience, and Quick Problem-Solving

Later in the day, I helped to lead the button-making station with Grades 2–4, which brought a completely different energy. This station was simple but very hands-on: students designed their button image, cut it out, and then came to the button press to assemble it.

My main role here was helping students physically press their buttons together. Many of the younger students needed assistance lining up all the pieces correctly and pulling the lever with enough force. I guided them step by step, showing them where to place each layer, supporting their hands on the press, and celebrating with them when their button came out perfectly.

I loved how this station naturally created small moments of mentorship, helping students brainstorm, celebrating their designs, and supporting them through mistakes. The hands-on aspect made it easy to build relationships through creative play.

A Final Reflection

By the end of the day, I was tired in the best way, the kind of tired that comes from being fully present, constantly adapting, and genuinely connecting with students. Leading both the Microbit AI station and the button-making station showed me two very different sides of Innovation Hour, and both were equally meaningful.

Working with the students on the Microbit AI watches taught me so much about the role of encouragement in learning. The watches didn’t always detect the movement students were trying to replicate, and it was easy for them to feel frustrated or confused. By modelling the movements myself, laughing off the “AI mistakes,” and reminding them that technology, just like humans, needs practice and revision, I watched their confidence grow. They became more willing to test out new ideas, reflect on why the watch responded the way it did, and view error as part of the process rather than a failure. It was a powerful reminder that curiosity thrives when students feel supported and unjudged.

At the button-making station, the learning looked completely different but felt just as impactful. Helping students press their buttons together required patience, step-by-step guidance, and lots of reassurance. For many of them, the physical coordination of setting up each layer and pulling the lever was a big accomplishment. Every time a button came out perfectly, their excitement was genuine and contagious. This station reinforced how meaningful hands-on learning can be, especially for younger learners who build confidence through small successes and personal attention.

Together, both stations highlighted what Innovation Hour is really about: giving students the freedom to explore, experiment, and create, while offering the right kind of support at the right moments. Whether it was troubleshooting unpredictable AI or helping a young learner pull a lever, every interaction contributed to a rich, joyful learning environment.

Innovation in Education – Weekly Reflection #9

Exploring the SD#5 Design Lab

This week’s class focused on Innovation in Education, at the SD#5 Design Lab. Rather than functioning as what some might think of as a traditional IT room, the Design Lab is a flexible, creative Maker Space where students can build, test, design, and prototype their ideas in hands-on, meaningful ways.

What the SD#5 Design Lab Is

The Design Lab is intentionally designed to support multiple ways of accessing learning. It’s a space filled with tools, materials, and opportunities for students to imagine, experiment, and problem-solve. One of the most surprising features?
The lab has over 30,000 LEGO pieces! A simple but powerful tool that can help students prototype, design, storytell, build structures, and work collaboratively.

Before this physical space existed, the teacher who runs it travelled between schools with bins of materials, offering pop-up making experiences for students. Soon, teachers can book the Design Lab online, bringing their classes in for sessions tailored to their learning goals.

How the Design Lab Supports Innovation in Education

Innovation in education isn’t only about integrating new technology, it’s about reimagining how learning happens. The SD#5 Design Lab encourages:

  • Creative problem-solving
  • Designing
  • Multi-sensory, hands-on learning
  • Student-led inquiry and exploration
  • Flexible, interdisciplinary projects

The space invites students to move beyond textbooks and worksheets and instead engage in real design, building, and collaborative thinking.

What Stood Out to Me

What stood out most was how intentionally the space is set up to spark curiosity. From the tools and materials to the open layout, everything invites students to explore. I also appreciated how the lab emphasizes the learning process over the final product. Mistakes, revisions, and “trying again” are all part of the journey.

I also loved hearing that the lab is connected to SKoot, a district resource full of cross-curricular lesson ideas that teachers can use to plan meaningful, integrated projects before bringing students to the Design Lab. It’s a great way to connect classroom learning with hands-on making.

I also learned that SD employees have access to Adobe Express. It is like Canva, but since I’m already a district employee, I don’t have to pay extra for the fantastic features it offers. What a win!

Activities I Explored

I tried several activities that gave me a real feel for what students experience in the lab:

  • ChompSaw – Great for safely shaping and cutting materials during prototyping.
IMG_6779
  • Cricut Machine – I used this to create designs for our upcoming Innovation Day on Friday, blending creativity and digital design.
IMG_6782
  • 3D Printer – Watching a design come to life layer by layer made me think about how inspiring this could be for students.
  • Button Making – This was such a simple but fun activity. It would be perfect for student identity projects, classroom branding, or creating badges during inquiry challenges.

Trying these activities helped me see just how accessible and engaging hands-on learning can be for all learners.

How I Would Use the Design Lab With Students

I can imagine using the Design Lab as a natural extension of inquiry-based and project-based learning. By using SKoot ahead of time to plan cross-curricular ideas, I could bring students in to:

  • Build models for science or social studies
  • Explore shapes, structures, and measurement in math
  • Create artifacts connected to literacy (character badges, story settings, symbolic objects)
  • Work through STEM challenges
  • Prototype solutions to real-world problems
  • Collaborate on group builds using LEGO or recyclable materials

Because the lab is bookable online, teachers can intentionally schedule sessions during units where hands-on learning would deepen student understanding.

A Project I Would Love to Do

One idea I’m excited about is a “Community Landmarks Design Challenge.” My oldest daughter is currently working on the idea of community in her class, and I feel like this would be a super fun idea! Students would:

  1. Research a meaningful place in our community
  2. Use SKoot to explore cross-curricular connections
  3. Sketch a blueprint
  4. Build a prototype using LEGO, Cricut elements, cardboard, or the 3D printer
  5. Test and refine their structure
  6. Present their model and explain its significance

This type of project blends social studies, math, literacy, engineering, and art. Talk about cross-curricular! Exactly what innovation in education is all about.

EdTech Presentation Overview – Weekly Reflection #8

In today’s tech class, we all shared and listened to the Educational Technology Inquiries we had this semester. Here is a quick rundown of the list of inquiries:

Group 1: Virtual Field Trips (Chloe, Sophie, and Makayla)

Photo by Remy Gieling on Unsplash

This group brought forward the idea of Virtual Field Trips and how they could be used in the classroom. The focus was on accessibility and how they could overcome the barriers of distance and time.

Accessibility Benefits:

  • Physical
  • Financial
  • Temporal Flexibilty
  • Geographic Reach
  • Sensory Adaptations
  • Language Support

Helpful Links: Learning LlamaThingLink, and the BBC Learning Hub

Group 2: Unplugged or Unprepared (Daleen, Shae, Dakota, and Grace)

Photo by Glenn Carstens-Peters on Unsplash

This group opened with a more holistic view on how tech should/shouldn’t be used in the classroom. They gathered real, on-the-ground insights by interviewing local teachers through a podcast format. Their main takeaway emphasized being purposeful with technology, selecting digital tools that genuinely support learning and establishing clear limits around how and when they’re used.

Helpful Links: Seesaw, Reading Eggs, Math Seeds, Mystery Science, and UFLI

Group 3: High Tech, Low Tech, and No Tech (Ella, Lela, and Benny)

Photo by Benja Godin on Unsplash

They examined how learning looks across high-tech, low-tech, and no-tech settings. High-tech environments make full use of digital tools and online platforms, low-tech classrooms keep things simple with supports like visuals or timers, and no-tech spaces focus entirely on hands-on, non-digital materials. They noted that each approach has strengths, but no-tech setups can limit inclusion when students rely on digital tools for accessibility. Their core message was to use technology thoughtfully, staying flexible and responsive to students’ actual needs.

Helpful Links: They created a QR code using Mentimeter

Group 4: Technology and Student Safety (Hannah, Breanna, Amanda, and Alexandra)

Photo by Alan J. Hendry on Unsplash

This group looked at how technology is being used to strengthen school safety. They reviewed tools like security cameras, predictive analytics, and various emergency response apps. While these tools aim to keep students safe and help families stay aware, the group also raised essential concerns around privacy, trust, and how constant monitoring might emotionally affect students.

Local data from the East Kootenays underscores the seriousness of the issue, with students reporting feeling unsafe, carrying weapons, or experiencing suicidal thoughts, making the balance between safety and privacy even more challenging and essential to address.

Helpful Links: Rave Panic ButtonCrisisGo, and Securly

Reflection

Overall, today’s presentations reminded me just how complex “technology in education” really is. It isn’t about being pro- or anti-tech, it’s about being thoughtful. Each group emphasized the importance of intentional use, whether we’re creating deeper access, finding balance between tools, or supporting student safety without compromising their sense of autonomy. As I move forward in my teaching journey, I want to continue asking myself: What purpose does this tool serve? Who does it include—or exclude? And how does it impact the whole learner?

This semester’s inquiries gave me a more holistic, nuanced understanding of educational technology, and I feel better prepared to use it meaningfully and responsibly in my future classroom.

GenAI in the Middle School Classroom – Weekly Reflection #7

What is GenAI?

When you think about Artificial Intelligence (AI) in schools, your mind might jump straight to students thinking it is the easy way out, and that they will use it to cheat their work as well as themselves. But in reality, Generative AI (GenAI) can be much more than a shortcut, it can be a powerful partner in creativity, critical thinking, and collaboration, especially in middle school.

Grades 7–9 are that incredible in-between space where students are starting to question, debate, and imagine the kind of world they want to build and who they are as people. This is where GenAI can help them think bigger, not just work faster.

Appropriate Usage

Photo by Emiliano Vittoriosi on Unsplash

1: AI as a Writing Coach, Not a Ghostwriter

One of the most exciting ways to use GenAI is as a drafting or feedback buddy. Students can brainstorm thesis ideas, get feedback on tone, or explore alternative sentence structures.

For example:

  • “Can you suggest a stronger hook for my essay about climate change?”
  • “Help me make my paragraph sound more persuasive without rewriting it.”

A great tool that has personally helped me with my writing is Grammarly. I would definitely recommend this program for struggling writers.

Why it works: It encourages reflection and revision rather than replacement. Students learn to critically analyze writing suggestions, developing stronger communication and editing skills essential for lifelong literacy.

2: Creative Design and Media Projects

Whether students are making podcasts, storyboards, or campaign posters, GenAI tools like Canva or image generators can help them visualize ideas in exciting ways.

Imagine a class project where students design advocacy posters for local causes or create AI-generated background images for digital storytelling. They can then critique each other’s designs and discuss ethics, authenticity, and originality in digital art.

Why it works: Students get to use AI to enhance creativity, not replace it. It opens conversations about authorship and digital responsibility while letting imagination lead the way.

3: Debate and Critical Thinking with AI

Middle schoolers love a good debate and GenAI can be a fun “opponent.”

Picture this: students ask an AI to argue a controversial or ethical topic from one perspective (“Why should social media be banned in schools?”), and then they take the opposing side. The AI’s reasoning can become part of the discussion: What arguments are strong? Which ones are biased or incomplete?

A great tool for this activity would be ChatGPT, as, hilariously enough, it often produces false information as well as bias.

Why it works: It sharpens media literacy and argumentation skills while teaching students how to question sources and evaluate bias.

4: Teacher Support — Scaffolds and Differentiation

For teachers, GenAI can be a time-saver behind the scenes. It can generate leveled readings, vocabulary lists, quiz questions, or sentence frames to support diverse learners. For example:

“Rewrite this science explanation for a Grade 7 reading level.”
“Create discussion prompts for different ability groups.”

A great tool for teacher support is MagicSchool.

Why it works: It helps teachers provide equitable access and Universal Design for Learning (UDL) supports while maintaining professional judgment and student safety.

When It’s Not Appropriate

Photo by Nik on Unsplash

Middle schoolers are still developing voice, integrity, and accountability, so it’s vital they understand that AI is a tool, not a shortcut. Overreliance can lead to loss of creativity or false confidence.

Instead, teachers can guide students to ask questions like:

  • “How did this tool help me learn?”
  • “Can I explain what the AI wrote — and why?”
  • “What’s my original contribution here?”

These reflective habits build digital citizenship and ethical awareness that they’ll carry into high school and beyond.

AI in General Becoming Scary

Warning: Deepfakes, Fake Nudes, and Digital Bullying

One of the scariest ways AI can be misused is to create fake nude images or videos of real people, sometimes called “deepfakes.” These images can be generated without anyone’s consent, then shared to humiliate, blackmail, or bully a student. Even if the images are “fake,” the emotional harm, embarrassment, and social consequences are very real.

What students should know (simple & clear):

  • Fake images are still harmful. Seeing a manipulated photo of yourself can be traumatic and sharing one is a form of bullying.
  • Never request, create, or forward intimate images of anyone. If someone asks you to, it’s not a joke and can carry heavy consequences.
  • If you find or are sent a fake image of yourself, don’t forward it. Save evidence (screenshots with URLs/timestamps), then tell a trusted adult right away.

What teachers/schools can do:

  • Teach this topic explicitly as part of digital citizenship: define deepfakes, discuss consent, and practice responses.
  • Build a clear, public school policy that explains reporting steps, removal requests, and supports for targets (counseling, temporary schedule changes, etc.).
  • Create a “what to do” checklist for students and families: preserve evidence, stop sharing, report to the platform, inform the school, and consider contacting police for threats/blackmail or sexual exploitation.

Quick prevention & response steps (classroom-friendly):

  1. Talk about consent: use role-plays and scenarios so students can practise saying no and asking for help.
  2. Bystander training: teach students how to safely intervene (report posts, refuse to share, support the person targeted).
  3. Digital safety plan: have students identify one adult they will tell and rehearse the exact first steps (save evidence — don’t share — tell an adult).
  4. Involve families: send a clear parent letter explaining what deepfakes are, how to support a child, and how to report.
  5. Support, don’t blame: when a student is targeted, prioritize emotional safety first — avoid punishment for victims who might have shared while panicking.

Why this matters: Middle schoolers are developing identity and social standing. A manipulated image can ruin reputations and mental health. Teaching students that technology doesn’t remove responsibility and equipping them with practical steps to prevent and respond helps protect everyone.

Children experiencing bullying, suicide, abuse, depression, or any other difficult life struggles, and who need a safe person to talk to, can reach out to Kids Help Phone.

Gamification – Weekly Reflection # 6

Exploring Gamification in the Classroom

This week, we dove into the world of gamification, exploring how digital games and game-based platforms can transform learning into something interactive, challenging, and genuinely fun. From math battles in Prodigy, to creative storytelling on PBS Kids, coding adventures in Scratch, and immersive simulations through Wired, we explored a wide range of tools that connect play with purpose.

Photo by Addy Spartacus on Unsplash

At first glance, it’s easy to think gamification is just about adding games to learning, but it’s so much more than that. It’s about utilizing the elements that make games engaging, including progress, challenge, feedback, and collaboration, to motivate and deepen learning. Watching how students respond to these tools makes it clear that well-designed gamified learning experiences can increase focus, boost confidence, and spark curiosity in ways traditional lessons sometimes can’t.

When we talk about gamification in education, we’re really talking about the art of blending the motivation and engagement found in video games with meaningful learning experiences. The Video Game Model highlights what makes games so effective at holding our attention using clear goals, instant feedback, increasing challenges, and a sense of progression and reward. These same principles can be powerful tools in the classroom when used intentionally.

Gamification is more than just adding points or badges; it’s about designing learning experiences that mirror how games motivate players. Games encourage persistence through failure (“try again!”), reward small successes, and create curiosity through exploration. They give players, or in this case, students, autonomy and a sense of ownership over their progress.

Gaming For Me

Photo by Victor Carvalho on Unsplash

Thinking back to my own gaming experiences, I can see how this model has always worked on me. In school, I remember playing Ski Free and Rodent’s Revenge — simple computer games that kept me glued to the screen because I wanted to beat my previous score or finally outsmart that cat! Outside of school, games like The Legend of Zelda and Super Mario were a huge part of my life, and honestly, they still are. I’ve spent hours exploring worlds, solving puzzles, and unlocking new levels. What made those games so powerful wasn’t just the graphics or the competition; it was the sense of purpose, discovery, and growth that kept me coming back.

As a future educator, I can absolutely see myself using gamification in the classroom. Not every student connects with traditional lessons, but most understand what it means to take on a challenge, level up, and feel proud of progress. Whether it’s using platforms like Prodigy or Blooket to make math more interactive, Scratch to bring creativity and coding together, or even designing classroom “quests” that let students earn achievements for collaboration and effort, gamification offers countless ways to make learning active and meaningful.

At its core, gamification reminds us that learning should feel like an adventure. One where students aren’t afraid to fail, keep trying, and celebrate their growth along the way. Just like in Zelda or Mario, the real joy isn’t in finishing the game, it’s in the journey of becoming stronger, smarter, and more confident with every step.

Take Me Outside, I Love A Challenge, and Chatterpix – Weekly Reflection #5

Take Me Outside Day: Movement, Creativity, and “I Love a Challenge!”

This year’s Take Me Outside Day was such a fun reminder of why learning beyond the classroom matters so much. I had the opportunity to join a local elementary school for the afternoon, and our theme was “I Love a Challenge!” — a perfect fit for a day centered on curiosity, movement, and growth.

We brought that idea to life through a creative and active activity that used something simple: a volleyball. The goal was to show how one object can connect learning across grade levels, while encouraging students to challenge themselves at every stage.

For Kindergarten, we kept it playful and exploratory. The challenge was simply learning to throw and catch the volleyball safely. We turned it into a little poem together using short lines that celebrated trying new things and cheering each other on. Their excitement was contagious; every catch felt like a victory!

With Grades 1–3, we leveled it up. This time, students added movement patterns by passing in pairs, bouncing, or creating little games to test coordination. Their poem grew too, reflecting teamwork and effort. It was amazing to see how they encouraged one another, even when it got tricky.

By the time we reached Grades 4–6, the volleyball became a symbol of persistence. Students experimented with volleys, bumps, and serves, but they also focused on the language of challenge. Their poem lines became more about being precise, not giving up, and celebrating progress over perfection.

At the end of the day, we gathered the poems together like verses of one big story, a story about growth, movement, and confidence. Watching the students connect physical activity with creativity was inspiring. It showed that learning doesn’t always come from a desk; sometimes it happens with dirt under your shoes, a ball in your hands, and laughter in the air.

Take Me Outside Day, Part Two: Leaf Man Comes to Life

The next day, I had the chance to join another local elementary school for their Take Me Outside Day, and this time our adventure took us down to Elizabeth Lake. The air was crisp, the trees were bursting with color, and you could practically smell fall in every step we took.

Before heading outside, the students had already read Leaf Man by Lois Ehlert — a beautiful picture book that celebrates imagination and the natural world. The story invites readers to see faces, animals, and stories hidden within the leaves that blow across the land. With that in mind, we set out to make our very own Leaf Men using what we could find around the lake.

The kids dove right into the task, searching for just the right leaves, pine needles, and bits of nature to bring their creations to life. Some Leaf Men had bodies made from nature bouquets, and some were simple, containing just a single leaf. The creativity was endless.

Once their Leaf Men were built, we used the ChatterPix app to make them talk. Each student recorded a little voice for their Leaf Man, giving their creations personalities, stories, and even jokes. Hearing their laughter as their digital Leaf Men “spoke” was pure joy. It was learning, storytelling, and technology all wrapped in one playful moment.

As we walked back from Elizabeth Lake, the kids were buzzing with ideas, holding their iPads like little storytellers who had just discovered something magical. It was the perfect reminder that learning outside doesn’t just change scenery — it changes perspective.

Both Take Me Outside Days showcased the power of outdoor learning, but in very different ways. The first emphasized challenge, movement, and teamwork, while the second nurtured creativity, storytelling, and connection to place.

The Venn Diagram I created helped me see that, although the activities looked different, both experiences shared a commitment to engagement, collaboration, and meaningful learning beyond the classroom walls.

In future teaching, I see opportunities to extend both experiences. For example, building on the “I Love a Challenge” theme through reflection journals about perseverance, or continuing the “Leaf Man” activity with written stories or art inspired by local ecosystems.

Ultimately, both days reminded me that outdoor learning is not a break from the curriculum, but rather an extension of it. Whether students are moving their bodies or moving their imaginations, the outdoors invites them to learn deeply, joyfully, and authentically.

Reflection – Free Inquiry #7

My Watermelon Blanket Journey

When I first started this blanket, I just thought it would be a fun, creative project. Something colourful to work on in the evenings, a mix of calm and accomplishment stitched into every row. I didn’t realize how much it would teach me about patience, persistence, and finding comfort in slow progress.

There were definitely some hiccups, like the moment I dropped a stitch and had to unravel part of the pink section I’d spent hours on. I was frustrated at first, but redoing it ended up making the blanket stronger and more even. It became a little metaphor for life: sometimes you have to pull things apart and start again to make them better.

By the time I finished adding the seeds and the rind, I wasn’t just proud of the way it looked, I was proud of the time and care I’d put into it. Each colour holds a memory: the early excitement of starting, the pink-section persistence, the calm rhythm of the final rounds.

Photo by Marie Dehayes on Unsplash

Now that it’s finished, my watermelon blanket feels like more than a cozy summer-themed throw. It’s a reminder that creating something by hand is slow and sometimes messy, but that’s what makes it meaningful. It’s not perfect — and that’s exactly why I love it.

Blanket Building Part 3 – Free Inquiry #6

Lets Talk Tension

One of the trickiest parts of crocheting, and something I’m forever working on, is tension. It’s that invisible balance between how tightly or loosely you hold your yarn. Too tight, and your stitches end up stiff and hard to work into. Too loose, and everything looks uneven and floppy.

When I first started my blanket, my tension was all over the place. Some rows were snug and perfect, while others stretched out like they were trying to escape. I’ve learned that tension isn’t just about how you hold the yarn; it’s about your mood, your posture, and even how relaxed you are. If I’m tense, my stitches are too. When I’m calm, everything flows more evenly.

Finding that sweet spot takes practice. Sometimes it means pausing, shaking out your hands, and letting your shoulders drop before starting again. Now I try to treat it like a rhythm, steady, even, and patient. Once you get into that groove, crocheting starts to feel less like a task and more like a quiet little dance between your hands and the yarn.

The Sweet Finish: Completing My Watermelon Blanket

After weeks of crocheting, undoing, redoing, and more than a few late-night stitching sessions, I finally finished my watermelon blanket, and it’s honestly even better than I imagined. The last section, the rind, tied everything together perfectly. Adding the thin white border between the pink and green made the colours pop, just like a real slice of watermelon. It’s such a small detail, but it completely transformed the look.

As I worked through the final rounds of dark green, there was this quiet satisfaction in every loop. Each stitch felt like closing a chapter. The green base, the pink fruit, the little seeds that made it come alive, and now this smooth, finished edge that sealed the whole thing together.

When It All Comes Together

When I finally snipped the last strand of yarn, I stood up, spread the blanket out across my floor and just stared at it for a minute. It’s bright, soft, and has a bit of personality in every stitch, including the spots where I had to pull things apart and start again. Those little imperfections are what make it mine.

Finishing this blanket reminded me that handmade projects aren’t just about the final product; they’re about patience, persistence, and finding calm in the repetitive rhythm of the work. Now it’s ready to keep me cozy all winter long, reminding me that summer is never too far away.

Blanket Building Part 2 – Free Inquiry #5

After finishing the soft green base of my watermelon blanket, I finally moved on to the fun part, the pink “fruit” section! This part has honestly been the most satisfying yet time-consuming part so far. As soon as the pink yarn started looping through my fingers, the whole blanket began to look like a watermelon instead of just a cozy mystery blob.

When Things Unraveled (Literally)

Once I got going on the pink section, I was totally in the zone. Looping along, feeling proud of how fast it was coming together. And then… I noticed it. A dropped stitch hiding halfway down the row, just sitting there mocking me. At first, I tried to convince myself it wasn’t a big deal, that maybe no one would notice. But once you see a mistake in crochet, you can’t unsee it.

What Even Is a Dropped Stitch?

(Check it out here!)

If you’ve ever crocheted (or knitted), you know that a dropped stitch is basically every crafter’s little nightmare. It’s when one loop doesn’t get worked into the next row, kind of like forgetting to button one hole on your shirt and then realizing it way too late.

At first, it seems like a minor mishap, just one tiny loop hanging loose, but that single stitch can throw off the whole pattern. Over time, it can unravel a whole section, create a visible gap, or make one side of the project start to lean or shrink. In my case, the dropped stitch was right in the middle of the pink section, so it would have stood out like a missing seed in the fruit!

The tricky part is that dropped stitches love to hide until you’ve gone way too far to fix them easily. That’s exactly what happened to me. I was feeling confident, moving fast, and then I spotted the little gap that shouldn’t have been there. The only fix? Pull it apart and redo that part. Talk about frustrating!

It’s irritating in the moment, but catching a dropped stitch early is actually a blessing. It keeps the blanket strong and even, and honestly, redoing it gave me a chance to slow down and appreciate the process instead of rushing through it. Every project has its hiccups, and this was mine for the pink section.

So, I sighed, pulled the yarn back, and started unravelling. There’s that split second where you watch your work come undone and wonder why you do this to yourself, but once I began reworking it, I felt at peace with it. Redoing the section actually helped me fix my tension and make the stitches more even. It’s funny how sometimes a mistake ends up making the final piece better.

Little Black Seeds

Once the first few rows of the pink section were underway, I started adding the seeds—the little black details that bring the whole piece to life. I used small loops of black yarn stitched in unevenly spaced spots, just like real watermelon seeds. They don’t have to be perfect (and that’s the best part). The tiny imperfections make it feel organic and natural, like something actually grown instead of made.

I decided it was time for a break. I stretched, rolled my shoulders, and grabbed some dinner. It’s funny how stepping away for even half an hour can reset your energy. Once I sat back down, I felt refreshed and ready to tackle more. I sat on the floor once again and cracked open the third skein of pink yarn. At that point, it really hit me how big this blanket was getting. The rows were taking longer, but seeing it grow with every round was so satisfying.

Somewhere around row 13 of the pink section, I realized just how much time I’d spent hunched over my blanket. My back was absolutely killing me. The kind of ache that only comes from sitting too long, too focused, and forgetting that posture is a thing. I decided that now is a good time for a hot shower to try and soothe my aches and pains.

It was now 10:00 p.m., and I was determined to complete this section.

There’s something meditative about watching each section come together, green to pink to the little pops of black. It’s like the blanket tells its own story as it grows in front of me. Each colour change feels like a milestone, and now I can really see how the final design will come together once the white and darker green borders are added.

11:30 p.m., and the fruit section was complete! It was time for bed, with a satisfying feeling of finally being done, having completed 3 hours of work on this part alone.

Next up: wrapping it all together with the rind! But for now, I’m just enjoying the bright, summery vibe of this pink middle. It is bringing me life in this cold and windy fall we are having.